To start with the process of decoupage on glass, it is crucial to gather the necessary materials. This step will ensure that you have everything required to complete your project efficiently.
Here is a 5-Step guide for Gathering Materials:
- Choose your decoupage paper pattern that best matches your glass item
- Pick up a glass cleaner and a microfiber towel
- Acquire Mod Podge or any other adhesive material
- Grab acrylic craft paint (any color you prefer)
- Purchase foam brushes and scissors for clean cuts and easy application
Additionally, make sure to gather all these supplies before starting the project to avoid interruptions during the process.
It’s important to pay attention to the details whilst gathering materials – it would help if you didn’t skip this step since missing even one item could potentially delay your effort.
Now that you have gathered all the essential tools and supplies for applying decoupage paper on glass, it’s time to begin creating something beautiful. Don’t miss out on any significant steps as it could impact your final outcome.
Go ahead, let curiosity take over, and dive into this fun-filled project with confidence!
Before you start decoupaging, make sure your glass is squeaky clean or you’ll end up with a surface that looks like it got attacked by a toddler with a glue stick.
How to Decoupage on Glass
The Glass Surface Preparation for Decoupage Application
Before applying decoupage paper on your glass surface, proper preparation is crucial to ensure a successful outcome. The glass surface must be thoroughly cleaned and dried, so the decoupage medium will adhere correctly.
Here are four steps to prepare the glass surface.
- Start by washing the glass with warm soapy water. Ensure that you remove any debris or dirt entirely from the surface.
- Next, use a clean towel to dry the surface completely. Any remaining moisture can cause bubbles when you apply the decoupage medium.
- After drying, use rubbing alcohol to clean the glass further. Rubbing alcohol eliminates residue and oil on the glass that might make it difficult for the decoupage paper to stick.
- For best outcomes when preparing your glass surface for decoupage application, only use a soft cloth or microfiber towel to avoid scratching or chipping it.
Pro Tip: If you have intricate designs that may be hard to cover entirely with standard-sized decoupage paper, try cutting them into smaller pieces instead of one large piece.
Get ready to make your glassware more impressive than your ex’s Instagram feed with these decoupage tips.

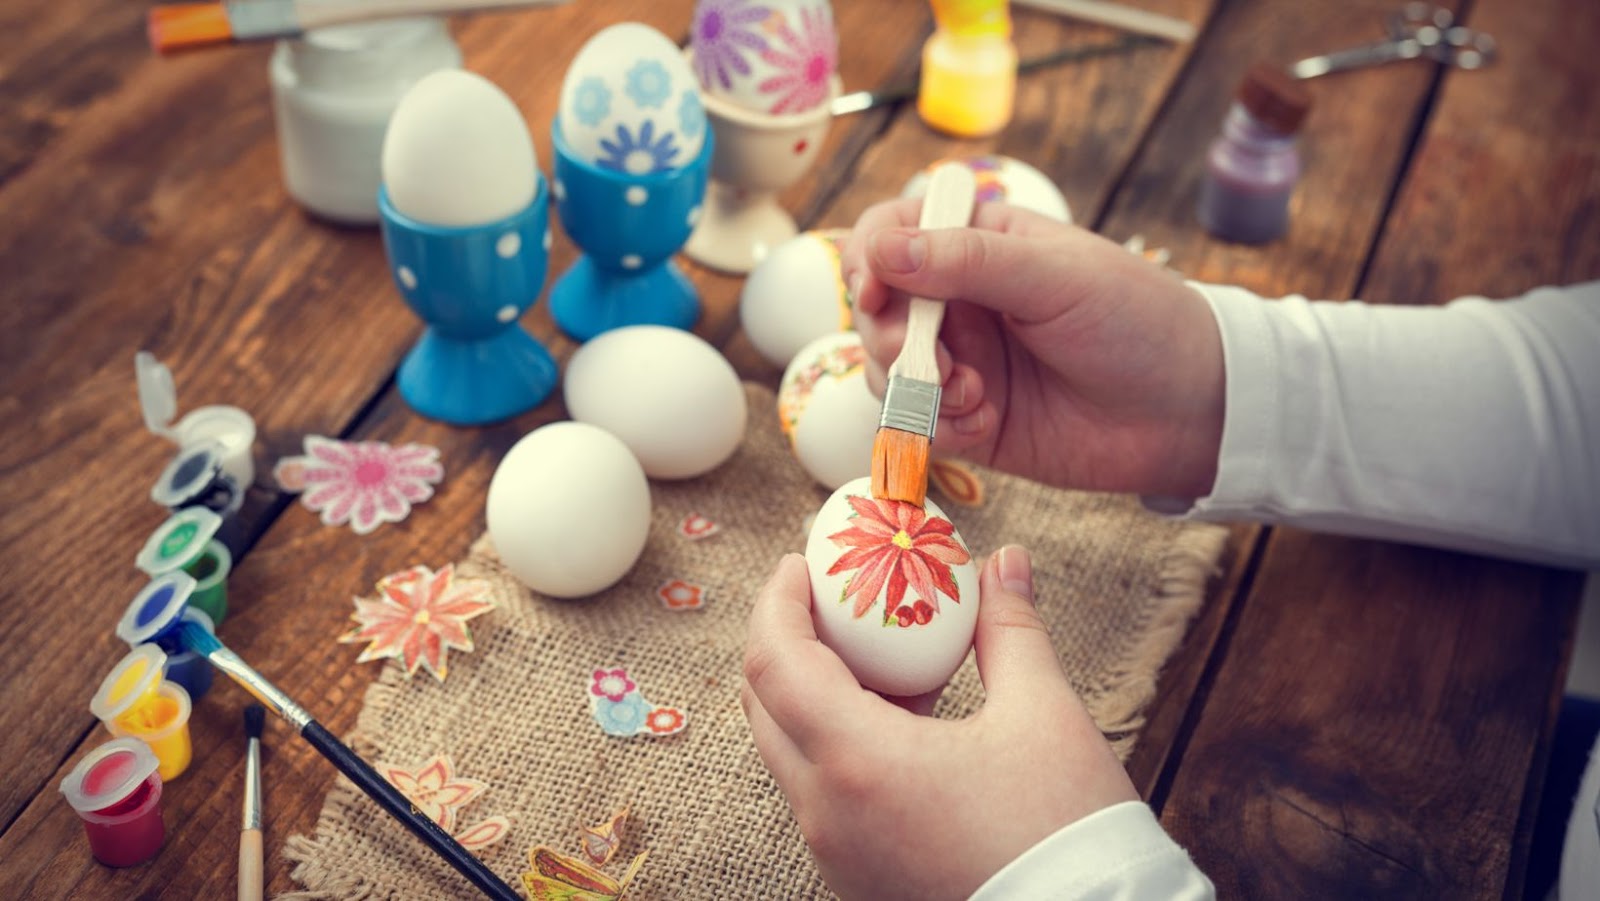
Applying Decoupage Paper
Decoupage on glass is a beautiful craft that involves attaching paper cutouts onto a surface to create intricate designs. To achieve this, one needs to go through the process of ‘Creating Decoupage on Glass’.
Here’s a 5-step guide to help you understand how to apply decoupage paper on glass:
- 1. clean your glass surface with soap and water. Make sure it’s dry before proceeding.
- Measure and cut out your desired design from the decoupage paper.
- Apply a thin layer of glue onto the glass surface using a flat brush.
- Place the decoupage paper onto the glued area, smoothing out any air pockets or wrinkles as you go.
- Once done, let it dry for at least 24 hours before applying an additional layer of glue to seal it in place.
One thing to keep in mind is that too much moisture can cause the decoupage paper to wrinkle or bubble up. Therefore, be cautious while applying glue and follow drying times strictly.
Overall, creating ‘Decoupage on Glass’ can be an exquisite way to enhance your interior decor or even make customized gifts for your loved ones.
Don’t miss out on this fabulous opportunity to experiment with decoupage art! Share your experiences with us in the comments below and don’t forget to tag us in pictures of your creations on Instagram.
Happy crafting!
Got bubbles under your decoupage paper? Just call it modern art and charge double for the unique texture.
Smooth Out Air Bubbles
When applying decoupage paper on glass, it is crucial to smooth out any air bubbles that might appear during the process. To achieve this, you need to follow some simple steps.
- Begin by laying your decoupage paper over the clean glass surface.
- Once you have gently placed it, use a rubber squeegee or credit card to press down and smooth out any air bubbles.
- If you find a stubborn bubble that won’t go away, take a pin and make a small hole in it; then use the squeegee or credit card again to smooth it out.
- Be gentle but firm when pressing down on the decoupage paper, as it may tear easily.
- Finally, let your project dry completely before handling.
Unique details – When dealing with larger bubbles or creases, don’t hesitate to start over with new decoupage paper for best results.
Call-to-action – Don’t let unsightly air bubbles ruin your beautiful decoupage project! Follow these simple steps and enjoy a perfectly smooth finish every time!
Add some flair to your decoupaged glass by finishing it off with a touch of glitter, because who doesn’t love a little extra sparkle in their life?
Finishing Touches
The final steps of decoupaging on glass involve enhancing the appearance to provide a perfect finish and preserve your work. These touches will not only make it look complete but also protect your art.
- Apply a layer of sealant for a durable finish.
- Smooth out any wrinkles or air bubbles using a squeegee.
- Clean up any excess glue or paper shreds from the edges using sandpaper or an X-acto knife.
Attention to detail is key in achieving excellent results. Take time to examine every aspect of your project and ensure that every detail is perfect before applying the finishing touches. Your patience and precision will pay off as you marvel at the stunning outcomes of your efforts.
The art of decoupage has been around since the 12th century, originating in China before spreading widely through Europe during the Renaissance period. It started as a technique for coating furniture with decorative papers or fabrics, causing it to become highly coveted among wealthy people seeking luxurious and artistic furnishings. Over time, advancements have been made in this art form, allowing anyone interested to learn how to apply decoupage on various surfaces such as glass, wood, metal, and more.
Decoupage on glass is like applying a temporary tattoo, but with more glue and potential for disaster.
Tips and Tricks for Success
When it comes to achieving success with your glass decoupage project, there are several tips and tricks you should keep in mind to ensure that your finished product looks flawless.
- Use a high-quality glue specifically designed for glass surfaces.
- Begin by cleaning and drying the glass thoroughly before applying any decoupage paper.
- Cut your paper into smaller pieces to make it easier to apply and avoid wrinkles or bubbles.
- Smooth out any creases or air pockets using a soft-bristled brush or sponge.
- Apply additional layers of glue over the top of your paper after it has dried to help protect it from damage.
- Allow ample time for each layer of adhesive to dry completely before moving on to the next step.
For additional success, consider experimenting with different types of paper and embellishments to create unique and personalized designs. Lastly, incorporating a sealant at the end of your project can help prevent scratches and scuff marks, ensuring that your piece remains beautiful for years to come. Remember that each suggestion works because they have been tested and tried, leading to countless successful outcomes.