
Protecting decoupage projects is crucial to maintaining their quality and durability. Whether it’s on wood or other materials, sealing decoupage properly ensures that the project lasts long and remains aesthetically pleasing. Here’s a guide on how to seal decoupage on wood effectively:
- Prepare the surface by sanding down any rough areas or bumps
- Apply a base coat of sealer using a brush or sponge
- Once the base coat dries, sand it lightly and then apply multiple coats of sealer until desired thickness is achieved
When sealing decoupage, it’s important to consider the type of sealer used as some may yellow over time while others remain clear. Additionally, sealing in a well-ventilated area is necessary due to the chemicals involved.
It’s worth noting that there are various types of seals available for decoupage projects that offer different finishes such as gloss, matte or satin. These can be incorporated into your project depending on personal preference.
A true story about protecting decoupage involves an artist who spent several weeks creating an intricate design on a wooden object only for it to get ruined when left exposed to moisture. This mishap led them to invest more time researching and learning about proper sealing techniques. Since then, they have never encountered such issues again and continue to successfully protect their decoupage artistry with appropriate sealants.
Get ready to seal the deal with these must-have materials for protecting your precious decoupage creation on wood.
How to Decoupage with Fabric
For achieving long-lasting and glossy finish on your decoupage project, you will need to gather all the necessary materials needed for sealing decoupage on wood.
- Decoupage Glue/Sealer
The first and foremost material would be the glue or sealer which is primarily used in the process of decoupage. Without this, it wouldn’t have been possible to proceed with the craft. - Paint Brush
The second most crucial material would be a paintbrush, which you could use to apply the glue or sealant on your project. Depending on the surface area of your wooden object, choose a brush that can help you apply an even and thin coat smoothly. - Sandpaper
To achieve a smooth surface, it is essential to sand down any rough edges and bumps before applying any sealer or glue onto your wooden surface. - Varnish/ Sealant
You also require varnish or sealants used in adding a defensive layer above your decoupaged wooden object to protect it from wear and tear.
It’s important to check whether all these materials are available before embarking on any decoupage venture.
While using sealants for protecting your wooden project, ensure only 2-3 coats are applied as too many layers could lead to peeling off of sealants over time.
For further protection against UV lights, consider adding UV inhibitors as they aid in preventing photo-degradation of sealers/varnishes.
Therefore, by selecting appropriate sealing materials compatible with wood surfaces and recommended products above, you’ll maintain and preserve your craft projects for longer periods.
Sealing your decoupage project on wood is like giving it a protective shield – and who doesn’t want their art to be Wonder Woman?
Steps for Sealing Decoupage on Wood
To protect your decoupage project on wood, follow these steps for sealing it. Begin by sanding the surface to create a smooth base. Next, apply a base coat of sealant to protect the wood and prevent any bleeding from the decoupage design. Add your desired decoupage design before finishing with a top coat of sealant to protect and give a glossy finish.
Sanding the Surface
The initial step in the sealing decoupage on wood process is to even out the surface. This is achieved by smoothing out the rough patches on the wooden surface, usually using a sandpaper.
To sand the surface for decoupage sealing, one can follow these six simple steps:
- Clean the wooden surface with a dry cloth.
- Attach the sandpaper to either an electric sander or block sander.
- Start with coarse-grit sandpaper and move gradually towards fine-grit sandpaper for smoother results.
- Sand gently in a circular motion, making sure that you cover all areas of the wooden surface evenly.
- When done, remove any dust using a tack cloth before applying anything else on top of it.
- Finally, wipe off any remaining debris from the surface with a damp cloth and let it dry completely before painting or adding another layer.
It is essential to avoid over-sanding as this may lead to uneven surfaces.
It’s important to note that not all types of wood require sanding before decoupaging; however, some might need light sanding.
In fact, I have come across instances where I didn’t have to sand a particular type of wood before applying decoupage. However, it’s always best to err on the side of caution and do some research or talk to an expert first before deciding whether or not you need to sand your wood surface.
Sealing decoupage on wood is like giving it a protective hug, but without the awkwardness.
Applying a Base Coat of Sealant
To properly seal decoupage on wood, a base coat of sealant is essential to protect the surface from any damage. This process involves covering the decoupage with a protective layer that will keep it looking great for years. Here is a 4-step guide to apply a base coat of sealant:
- Choose an appropriate sealant based on your project needs. Consider factors like durability, glossy or matte finish, and level of protection.
- Clean the surface of the wood thoroughly using a mild soap and water solution. Dry it completely before proceeding to the next step.
- Using a clean brush, apply a thin and even layer of sealer over the entire surface of your workpiece. Be careful not to leave any unsightly streaks or bubbles behind.
- Allow sufficient time for drying as per manufacturer’s instructions before initiating further steps.
It’s important to remember that each sealant product may have its own specific instructions about application techniques and drying times, so always read the label carefully beforehand. In addition, some thick or high-gloss finishes may require multiple coats so don’t hesitate to apply additional layers until you achieve your desired result.
Make sure to avoid direct sunlight or moisture exposure during drying time. Bring in ample ventilation if possible for faster drying times and better results. Remember: A quality base coat will set the foundation for topcoat applications and ensure longevity of your beautiful masterpiece. Don’t just slap on any decoupage design, make sure it’s worthy of your now-sealed-for-eternity wood masterpiece.
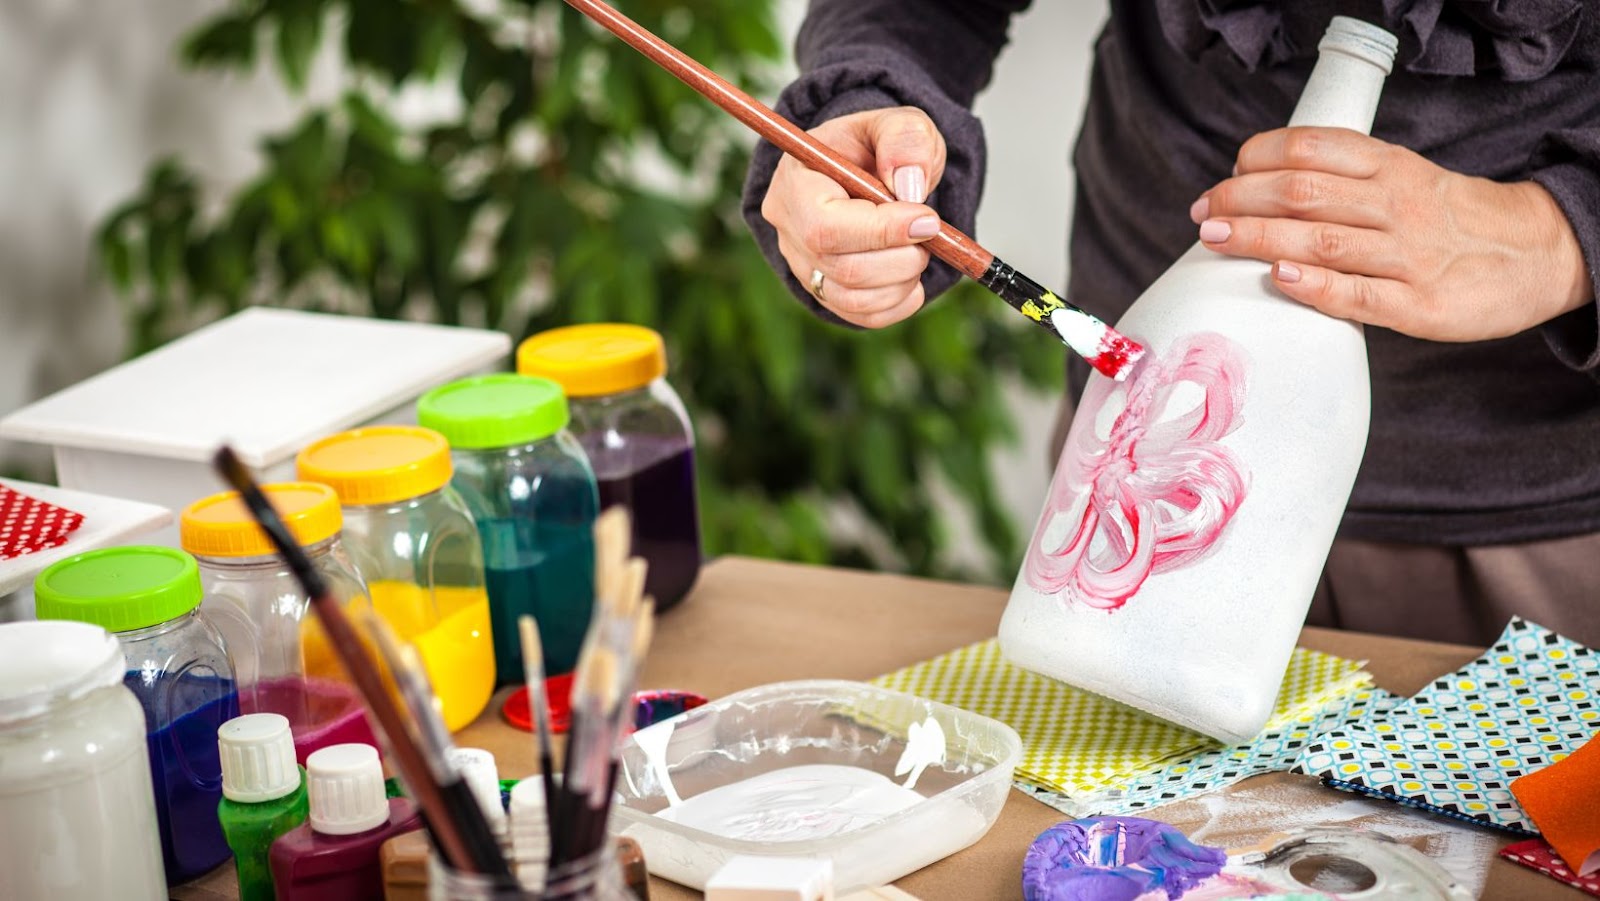
Adding Decoupage Design
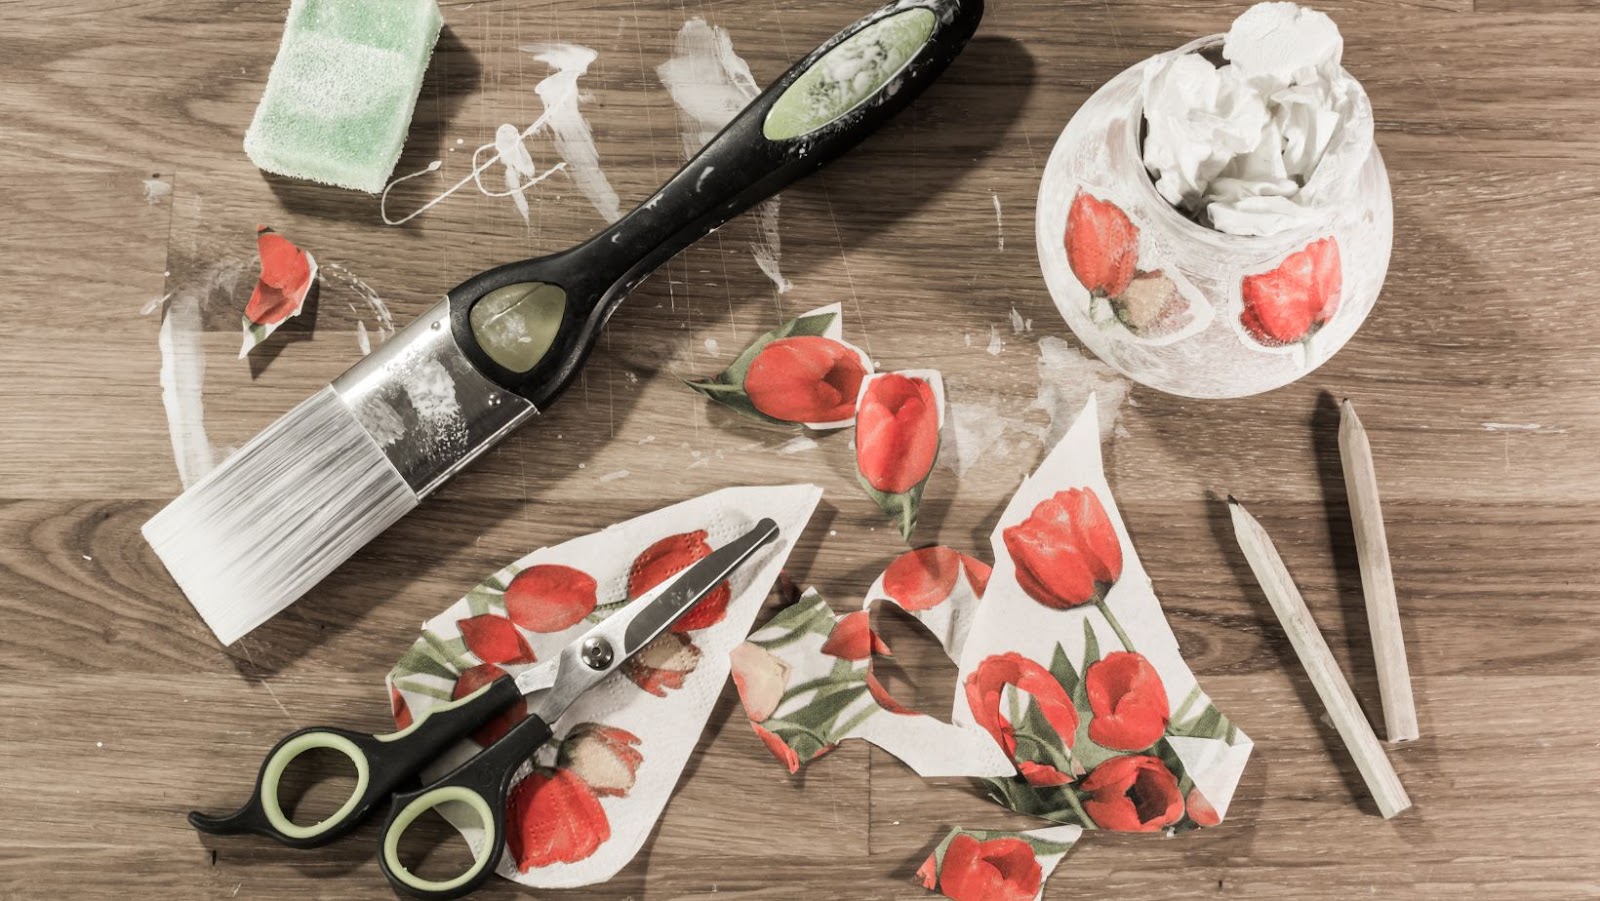
For those who want to embellish a wood surface, adding a decoupage design is an excellent option. It involves layering paper cutouts or prints on top of the wood surface, creating an intricate pattern or image. Follow these four simple steps in adding a decoupage design to your wood surface:
- Choose a design for your decoupage.
- Gather the supplies you will need, including papers, scissors, paintbrushes, and newspaper.
- Cut out the necessary papers and arrange them on the wood surface according to your desired pattern.
- Apply glue or decoupage medium onto the back of each paper cut-out before gently pressing it onto the prepared wood surface.
It is essential to practice patience when working with decoupage as it requires time for each layer to dry. To achieve superior results, ensure that all materials get chosen with careful consideration for durability and style.
Adding a decoupage design onto wood surfaces has been used since ancient times as a method to give new life to old objects. The tradition continues today as people alike still find joy in reinventing their beloved old furniture with exceptional designs. This can be done using simple everyday materials, including scrapbook paper, magazines and even tissue paper!
Sealing decoupage on wood is like putting a coat of armor on your masterpiece – protect it from the elements like a boss with these easy steps.
Applying a Top Coat of Sealant
Protecting your decoupage on wood with a top coat of sealant is an essential step in preserving its beauty and longevity. By providing a layer of protection against dust, moisture and abrasions, the sealant keeps your design looking vibrant and new.
Here are 5 simple steps for applying a top coat of sealant to your decoupaged wood:
- Choose the right type of sealant – water-based or oil-based depending on your preference.
- Prepare the surface by gently sanding any rough spots or drips from glue or paper.
- Apply the first coat with a foam brush or spray gun using long strokes in one direction.
- Allow the coat to dry completely before applying another thin layer. Two coats should be enough for most designs.
- Cure the sealant according to the manufacturer’s guidelines before using it. This may take several days, so be patient!
It is important not to rush through these steps as haste can lead to bubbles, wrinkles or uneven coverage. Make sure you have adequate ventilation and follow safety precautions as recommended by your sealant’s instructions.
For added protection, consider adding wax or polish after sealing for extra shine and durability.
Did you know that Egyptians used decoupage techniques to decorate wooden coffins over 4000 years ago? In those times, it was called ‘Inlaid work’ and involved arranging tiny pieces of ivory, gold and precious stones into intricate patterns on wooden surfaces. They also used colorful papers to create beautiful designs on furniture items such as chairs, tables and wardrobes!
Sealing decoupage is like sealing a deal, just with more Mod Podge and fewer lawyers involved.