Table of Contents
ToggleHow to Turn Shells and Driftwood into Simple Home Decor starts with a single discovery: a weathered stick and a handful of shells can transform a blank wall or table into a coastal scene. Readers who want low-cost, low-waste decorating can work with found materials, learn simple cleaning and assembly techniques, and make pieces that feel personal. This guide explains why these materials matter, how to prepare them safely, and four easy projects that use common tools and glue. It keeps steps clear so a beginner can finish a piece in an afternoon.
Key Takeaways
- Using shells and driftwood in home decor brings a sustainable coastal style that connects your space to nature and personal memories.
- Proper cleaning and drying of shells and driftwood are essential to ensure safe, long-lasting decorative pieces without contamination or damage.
- Creating driftwood wall hangings involves simple measuring, arranging, and gluing techniques that even beginners can complete in under two hours.
- Shell candle votives and centerpieces offer easy, stylish accents that evoke a beachy atmosphere with minimal tools and materials.
- Mini projects like shadow boxes and photo displays provide quick, customizable ways to showcase shells and driftwood creatively.
- Regular care, including dusting and avoiding moisture traps, preserves the beauty and durability of your coastal decor creations.
Why Use Shells And Driftwood In Your Home — Style, Sustainability, And Story
Shells and driftwood bring texture, memory, and a low environmental cost into a room. They create a coastal style without plastic or mass-produced decor and link a home to place: a shell may recall a specific beach walk, and driftwood shows the work of storms and tides. Using locally found materials reduces waste and shipping, which makes these pieces greener than store-bought items.
Practical benefit: driftwood is a reclaimed natural material that needs no finishing to look intentional. A small drawback is contamination, salt, sand, and tiny organisms can cling to finds. But with the simple cleaning steps in the next section, the risks drop to nearly zero.
Personal note: the author once brought home a heavy bleached branch that smelled faintly of kelp: after cleaning it, the branch became the proud centrepiece above a mantle. That mistake, grabbing too-large pieces before measuring, taught a useful lesson: measure first, carry second. This keeps effort and frustration low when turning finds into decor.
Materials, Tools, And How To Prepare Finds Safely
Start with these materials: shells, driftwood, natural twine, hot glue or epoxy, cotton gloves, a scrub brush, mild soap, a bucket, and sandpaper (120–220 grit). For votives or glass work add glass jars and sand. Tools: scissors, needle-nose pliers, a small drill with a 1/8″ bit, and clamps.
Immediate answer: always clean and fully dry shells and driftwood before assembly. For driftwood, brush off loose debris, soak in fresh water for 24–48 hours to leach salt, then scrub with a stiff brush. For stubborn barnacles or sea growth, boil small pieces for 20 minutes or soak briefly in a diluted bleach solution (1 part bleach to 10 parts water), then rinse thoroughly. Let wood cure indoors until completely dry, that can take several days for thick pieces.
For shells: rinse, soak in warm soapy water for 20–30 minutes, scrub gently with a toothbrush, and air dry. Avoid strong solvents: they can dull colors. Inspect each item: cracked shells work as accents, but fragile pieces should be backed or sealed before gluing.
Safety note: wear gloves when using bleach or epoxy and work in a ventilated area. After cleaning, store materials in a breathable container so moisture doesn’t trap and mold won’t form.
Project: Driftwood Wall Hanging — Step‑By‑Step
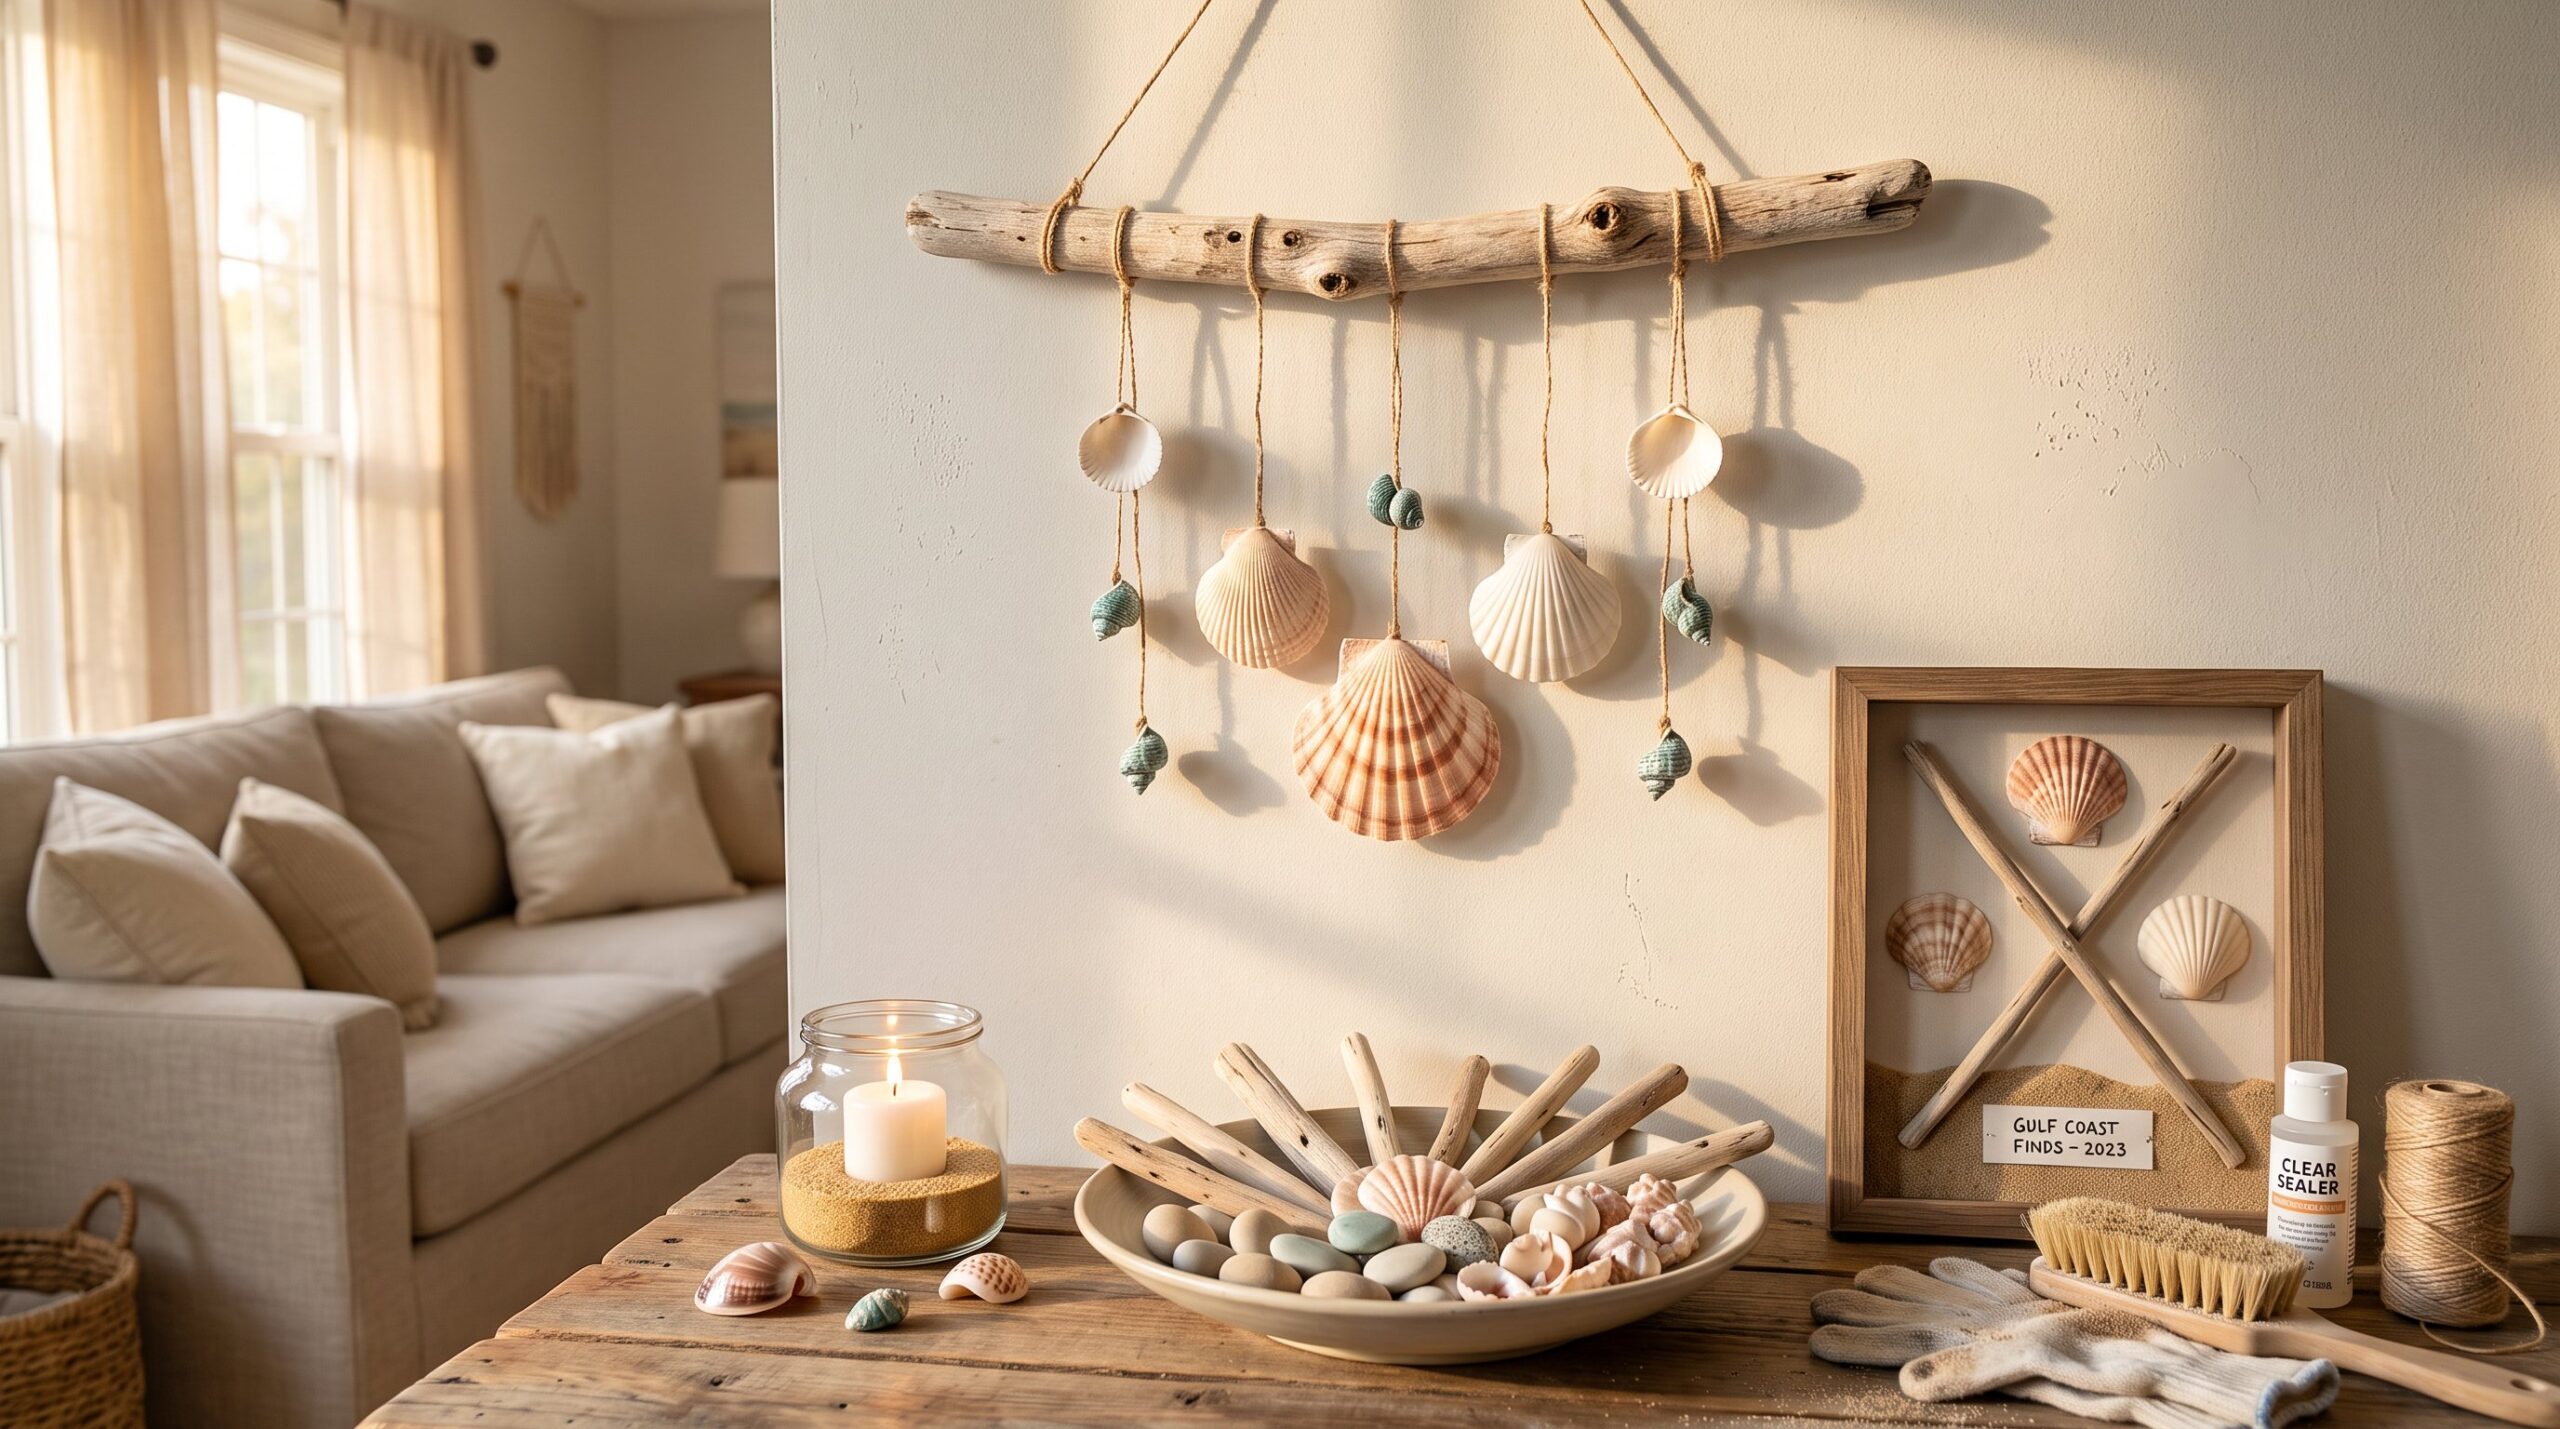
Fact first: a driftwood wall hanging takes under two hours of active work once pieces are clean and dry. Begin by choosing a driftwood piece 18–36 inches long for balanced scale over a small sofa or bed. Lay it flat and experiment with shell arrangements before attaching anything.
Step 1: measure the wall width and choose driftwood that sits within two-thirds of that span to avoid overpowering the space. Step 2: mark three attachment points on the wood where string or twine will hang shells: spacing of 2–6 inches looks balanced. Step 3: if shells have natural holes, thread twine through and knot. If not, use a small dab of waterproof epoxy to glue shells to 6–8″ lengths of twine, then clamp to set for 30 minutes.
Step 4: knot a hanger loop at each end of the driftwood with sturdy cord. Test the weight on a hook before final hanging. For a cleaner look, add a short line of glued pebbles or small shells along the top edge.
Design tip: vary shell sizes for rhythm, anchor the center line with the largest shell and use smaller shells outward. For durability in humid rooms like bathrooms, choose marine epoxy over hot glue and keep pieces away from direct splash zones.
Contextual link: readers building a larger coastal crafting practice can borrow pattern ideas from a useful regional overview on Gulf Coast craft ideas.
Project: Shell Candle Votives And Simple Centerpieces
Core insight: shells turn ordinary candles into beachy focal points with minimal tools. For a shell votive, gather a clear glass jar, small shells, coarse sand, and a tea light or short pillar candle. Fill the jar base with 1–2″ of sand, nestle shells around the candle, and place the candle centrally. Use larger shells as stands for tapered candles.
Alternate method: glue small shells around the outside rim of a jar using clear-drying craft glue or epoxy: allow 24 hours to set. This creates a textured edge that catches candlelight and shadow. Never glue directly to a candle, heat can degrade adhesives.
Centerpiece option: use a shallow bowl, place a 2″ pillar in the center on a disk of sand, then arrange driftwood fragments like spokes and tuck assorted shells between them. This composition balances natural lines and adds height without extra expense.
Practical warning: never leave candles unattended beside dried driftwood. Place votives on ceramic dishes and keep them away from drafts. For long-term charm, swap in battery-operated LED candles when leaving displays near fabrics or high-traffic spots.
Nearby resource: readers interested in coastal gardening and display pairings may find tips on plant-safe decor in a guide to raised beds in coastal climates.
Quick Mini Projects: Shadow Box And Photo Display
Immediate result: shadow boxes let shells and small driftwood pieces tell a story, a walk, a trip, a memory, in under an hour. Use a standard 8×10 shadow box, a small clump of sand, two thin driftwood sticks, and 6–10 shells. Glue sticks diagonally as a stage and arrange shells on top, then add a small handwritten label for place and date.
For a photo display: glue tiny shells around a simple wood frame or tie photos to a short driftwood stick with clothespins and twine for a casual hanging display. This method shows photos and keeps them changeable.
Honest note: fragile shells can crack when drilled for hanging. A safer option is to tie them in mesh or use adhesive pads on the back of the shell to avoid drilling. These mini projects are forgiving: mistakes can become texture, a broken shell glued in layered clusters reads as intentional.
Finishing, Care, And Styling Tips For Long‑Lasting Coastal Decor
Key fact: letting materials dry and choosing the right adhesives determines longevity. Seal driftwood with a matte clear sealer if it will sit in humid rooms: skip shiny finishes if a natural look matters. For shells, a thin coat of spray clear sealer brings out color and prevents flaking for pieces handled often.
Care routine: dust pieces weekly with a soft brush. Avoid enclosed displays where trapped moisture can encourage mildew. If a display gets dusty, rinse shells gently and air dry before reassembling. Replace candles before wax drips onto glued shells, wax can lift adhesives.
Styling advice: mix sizes, one large shell, two medium, and three small creates a natural triangle the eye likes. Anchor a vignette with a neutral object, a linen napkin or a simple clay pot, to keep the look collected rather than cluttered. Add non-marine accents such as rope, metal, or faux succulents to bridge coastal pieces with everyday decor.
For readers building a broader Gulf Coast crafting practice, the site offers a comprehensive resource that connects these projects with local fishing and gardening interests in a helpful regional guide.
Conclusion
Working with shells and driftwood turns simple finds into meaningful decor that is personal, sustainable, and inexpensive. A short cleaning routine, a few basic tools, and the step‑by‑step projects here let a hobbyist produce pieces that last. The best results come from small experiments, accepting a few broken shells, and refining techniques with each project.